When we moved here 3 years ago we wanted to get into a more traditional way of living. We wanted to grow some of our own vegetables, make more of our own food, hunt our own meat and generally learn what were new skills to us, even if they are the old skills to others. This is a record of some of the things we have tried, and our sucesses (and failures) as we continue our journey of finding out new stuff...

Thursday 10 December 2009

Frugal Christmas

The credit crunch is hitting many people and this year it is actually OK to give home-made gifts rich in time, and low in cost. Finally, people have worked out that a gift made with care and attention really can be worth more than one with a large price tag attached.

At Clampitts, we have been preparing for Christmas since August when we harvested our Gooseberries. They were turned into a lovely rich chutney, full of fruit and spices.

From September, we were collecting blackberries, and what a year it's been for them! The first few were turned into gooey jam, while the later ones were added to our own Cox's Orange Pippins and made into Apple & Bramble Jelly. I am rather proud of this, as it's crystal clear and utterly gorgeous - the secret is a splash of Cassis in the mix, yum! Recipe here.

Finally, in October we pruned back our lavender beds, but collected the stems and dried them, before removing the fragrant dried flowers. I have been beavering away making little applique and patchwork cushions to fill using offcuts from my quilting, and now have a load of fabulous smelling lavender cushions to fill the wardrobes and drawers of our nearest and dearest.


Hopefully they will agree that a basket filled with months of effort is a suitable Christmas gift.

Last Christmas, I gave you a sewing machine...

Last Christmas, I was feeling rather that my creativity had been stifled and I needed to get a hobby. Years ago, I got my artistic thrills via amateur theatricals, but these days I sadly don't have the time to commit to that. I've never been much cop with a paintbrush or pencil, but did quite enjoy my forays into sewing at school... so I asked that anyone who felt the urge the buy me a present contributed to a sewing machine fund, and bought myself a Janome J1012.

I quickly got to work on my first project, reminding myself how to make a very basic patchwork quilt. I had it in mind as a present for my grandma's 90th birthday, so had to keep it simple!

Using a 4" square block design and 3 materials, I learned how to piece blocks, why ironing your seams is so important and how not to tackle binding. I bought myself a cutting board and rotary cutter (which revolutionised things) and spent a lot of time on You Tube checking out videos of techniques.

The quilt itself was far from perfect (although my 90 year old grandma seemed to like it), but certainly whetted my appetite to tackle something more.

With friends getting married in June, I decided to make their wedding present, not realising quite what a mammoth task I would be taking on in designing and making a kingsize quilt.

Once again, I decided to keep the design fairly simple, although I did branch out from the absolute basics of my first attempt.

I was still ignorant of the existance of recognised block patterns, so just played with Excel to create a pattern which once again played around the theme of a 4" block. The middle panel was 2" squares, with a border of 2x4" panels, followed by 4" squares and a further narrow border, all with corner detailing. The edge was pieced in 8" panels, and the whole was bias bound.

Using recognised blocks would have made the piecing easier, but the lessons I learned making my grandma's quilt meant it was still reasonably straightforward.


Working on such a large scale did prove challenging, and I did eventually have to take it into work to baste the 3 layers together (patchwork top, batting/wadding and backing fabric) as I did not have a bit of floor big enough to lay it out completely flat in the house! I usually baste with safety pins, but given the size of the quilt and the forces which it therefore exerted trying to move the 3 layers, I could not get it tightly attached enough with them. I eventually resorted to a pricing gun, putting tiny plastic tacks (like shops use to attach price tags) in at 2" intervals throughout the whole quilt. This worked well, but was a pain to remove! If I tackled something like this again, I would probably manually tack it - harder work in the first place, but much easier to remove.
For the binding I made my own bias binding, and machine sewed it to the front of the quilt, manually finishing it to the back. I couldn't feel the end of my index finger for 4 days after all that hand sewing! Still, I think the finished result was worth it.


A crash course in pheasant preparation...

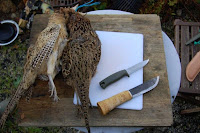
I love living in the country! Last weekend, as we sat having a pint in the pub, a chap came in from a day's shooting. A bit of chat ensued, and we ended up with a brace of pheasant!


Today we tackled preparing them for the first time (after hanging in the shed for 3-4 days). Having prepared many rabbits for the pot I have learnt the value of decent knives, for this job I selected a standard Mora knife by Frosts of Sweden, and a Leku by Roselli of Finland.


First take off the wings using the Leku.


Then the head


Then the legs, using pliers to ensure you get the tendon out too.
This was trial and error, not using the pliers I only got half the tendons out and broke the thigh bone.


Then you can remove the skin by just peeling it away


Clear the crop (you can check out its last meal if you want to)


Slice under the breast to open up the bird's cavity and remove the guts


Finally, cut off its backside, wash and voila!